Introduction
Hey there, Minecraft fan! Have you ever wanted your own Bedrock-dedicated server where you and your friends can play anytime, without limits? A Bedrock dedicated server is like having your private playground in Minecraft Bedrock Edition. And when you add add-ons, it becomes super fun—like magic packs that add new animals, tools, or even flying pigs!
Players love a Bedrock dedicated server with addons because it’s always on, super fast, and you control everything. No waiting for someone to host from their phone or console. You can build huge worlds, fight custom bosses, or explore new biomes. It’s perfect for big groups or long adventures.
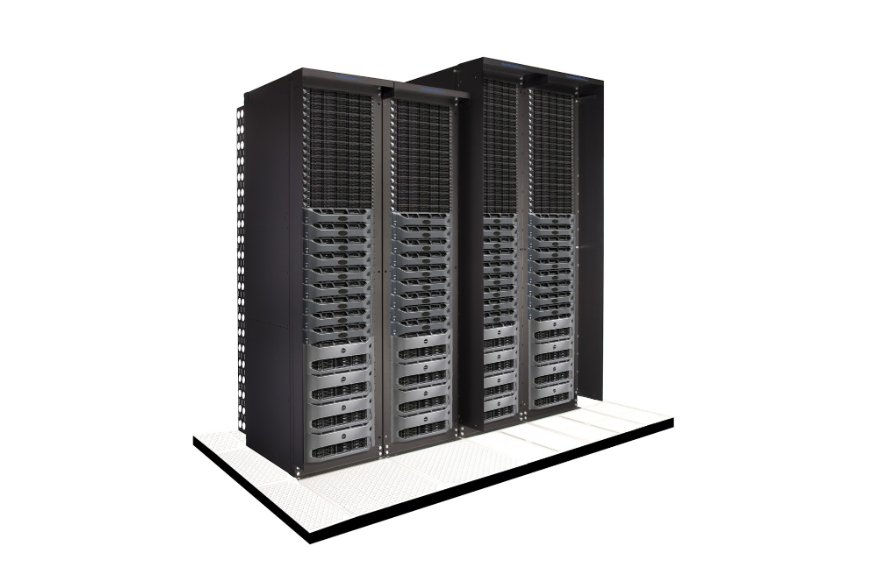
These pictures show cool Bedrock dedicated server setups and friends joining. Imagine that for your games! In this guide, we’ll learn how to make a Bedrock dedicated server with addons step by step. It’s easy, even for beginners.
What is a Bedrock Dedicated Server?
A Bedrock dedicated server (or BDS) is a special program from Mojang that runs a Minecraft world just for multiplayer. It’s “dedicated” because it uses a whole computer to run the server, not your game. This means smooth play for many friends, even if your device is busy.
Think of a normal server: When you host from Minecraft (like “Open to LAN”), it’s on your device. If you close the game or lag, everyone stops playing. But a Bedrock-dedicated server runs in the background on a PC or always-on machine. Friends can join anytime via your IP address.
The big difference? Normal servers are simple but weak for big groups. A Bedrock-dedicated server handles 10+ players easily, has better speed, and lets you add rules like no griefing.
Now, add-ons make it awesome! Add-ons are packs that change the game—new mobs, blocks, or powers. A Bedrock dedicated server with add-ons turns vanilla Minecraft into a custom adventure. Advantages: Full control, no crashes from sharing, and safe for kids’ worlds. Everyone gets the same fun packs automatically.
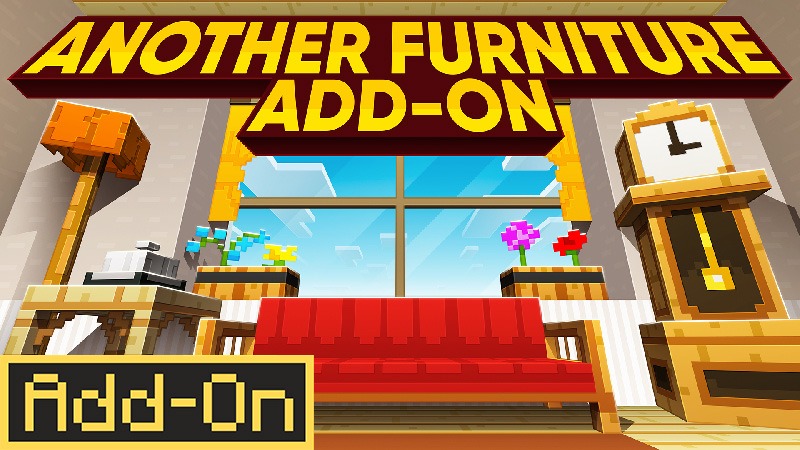
See those? Add-ons like furniture or dinosaurs make your Bedrock dedicated server epic!
3. Requirements to Make a Bedrock Dedicated Server
Before starting, check if your computer can handle a Bedrock dedicated server. It’s like checking if your bike has enough air for a race.
Hardware needs:
- CPU (brain): At least a dual-core like Intel i3 or AMD equivalent. For 10 players, 4 cores are better.
- RAM (memory): 2GB minimum, but 4-8GB for smooth play with addons. More players = more RAM.
- Storage: 10GB free space for world files. Use SSD for fast loading.
- Network: Upload speed 5 Mbps+. You need a good internet connection for friends to join.
Software needs:
- OS: Windows 10+ or Ubuntu Linux 20.04+. Mac? Use a virtual machine or rent a server.
- Minecraft: Bedrock Edition on your device to join and test.
- Ports open: UDP 19132 (main) and 19133 (IPv6). We’ll explain forwarding later.
For add-ons, no extra power is needed—they load from folders. Download the latest BDS for the best security. If your PC is old, rent a cheap host like from [Minecraft Bedrock Tips]. Ready? Let’s build!
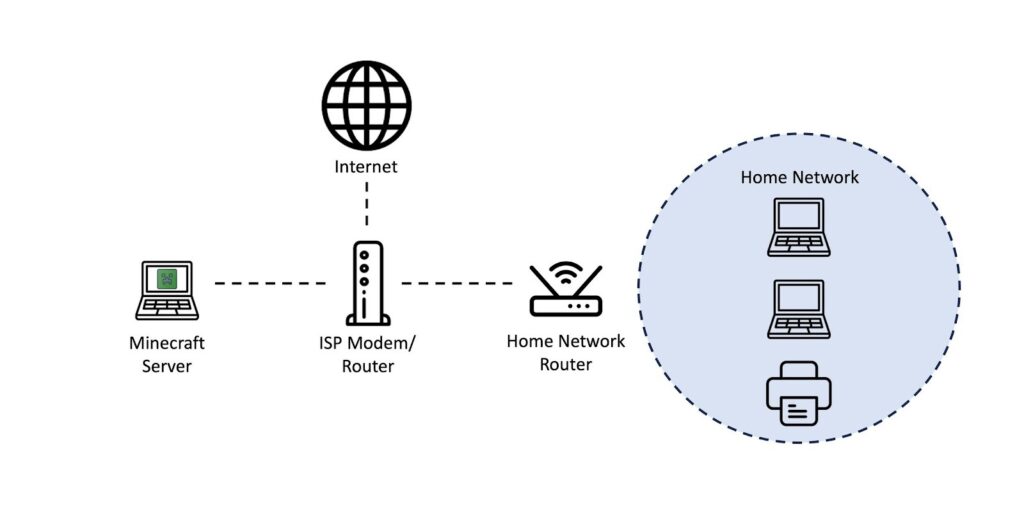
This diagram shows a simple home setup for your Bedrock dedicated server.
How to Make a Bedrock Dedicated Server
Making a Bedrock-dedicated server is like building a Lego house—step by step!
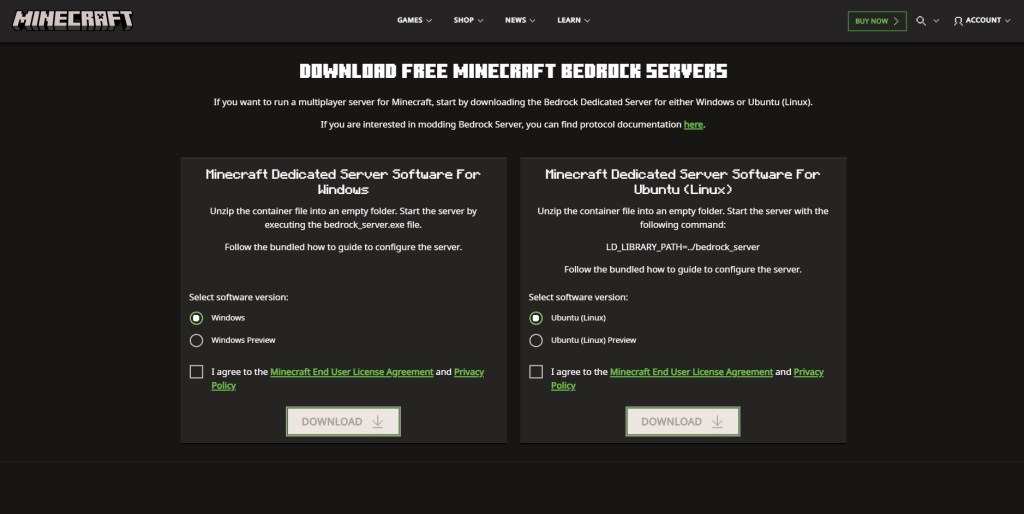
Step 1: Download Bedrock Dedicated Server
Go to the official site: https://www.minecraft.net/en-us/download/server/bedrock. Pick Windows or Ubuntu ZIP. Always get the latest version for bug fixes and new features. Unzip to a new folder like “MyServer.” Don’t use old versions—they crash with new add-ons!
Step 2: Set up the Server
Open the folder. Find server properties—edit with Notepad:
- server-name=Your Cool Server
- gamemode=survival
- difficulty=easy
- max-players
- online-mode=true (for real accounts)
Save it. For Linux, set permissions: chmod +x bedrock_server.
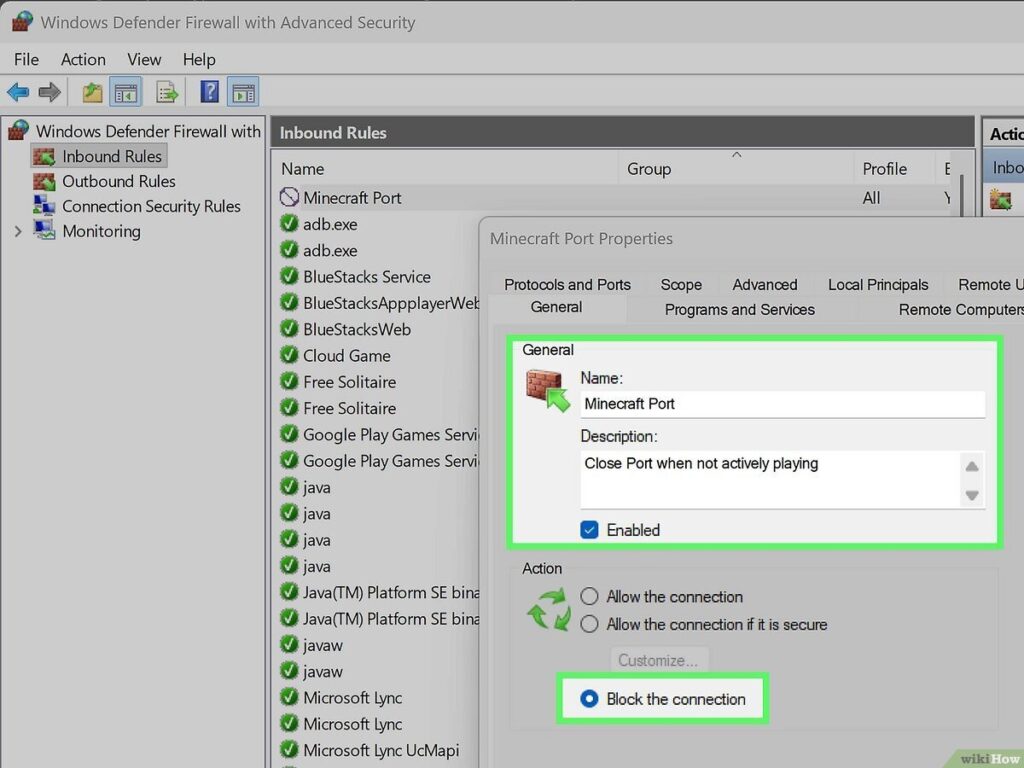
Port forwarding: Tell your router to let friends in.
- Find your public IP: whatismyip.com
- Log into the router (192.168.1.1 usually).
- Add rule: UDP port 19132 to your PC’s local IP (ipconfig in CMD).
- Turn off the firewall or allow the port.
Test locally first!
Step 3: Install Add-ons
Add-ons make your Bedrock dedicated server with add-ons shine! Find free ones on MCPEDL or Marketplace (export .mcpack).
- Download the add-on (behavior + resource packs).
- Unzip to worlds/Bedrock level/behavior_packs/ and resource_packs/.
- Open manifest.json for UUID (copy it).
- Edit world_behavior_packs. json: Add {“pack_id”: “UUID”, “version”: [1, 0,
- Same for resource packs.
- Restart server—activate in-world settings.
Add-ons enhance new swords, pets, or maps. Popular: Naturalist (animals), Dinosaurs, Furniture.
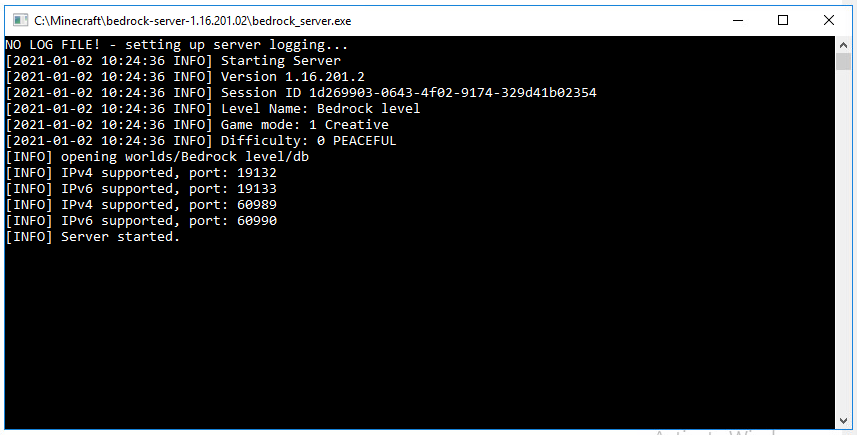
Step 4: Launch and Test the Server
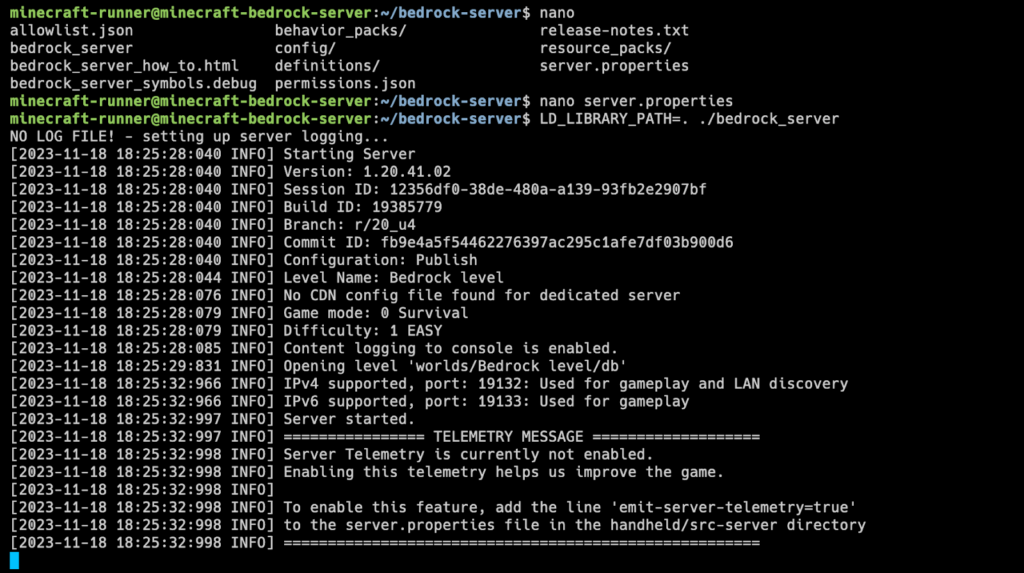
Windows: Double-click bedrock_server.exe. Linux: ./bedrock_server
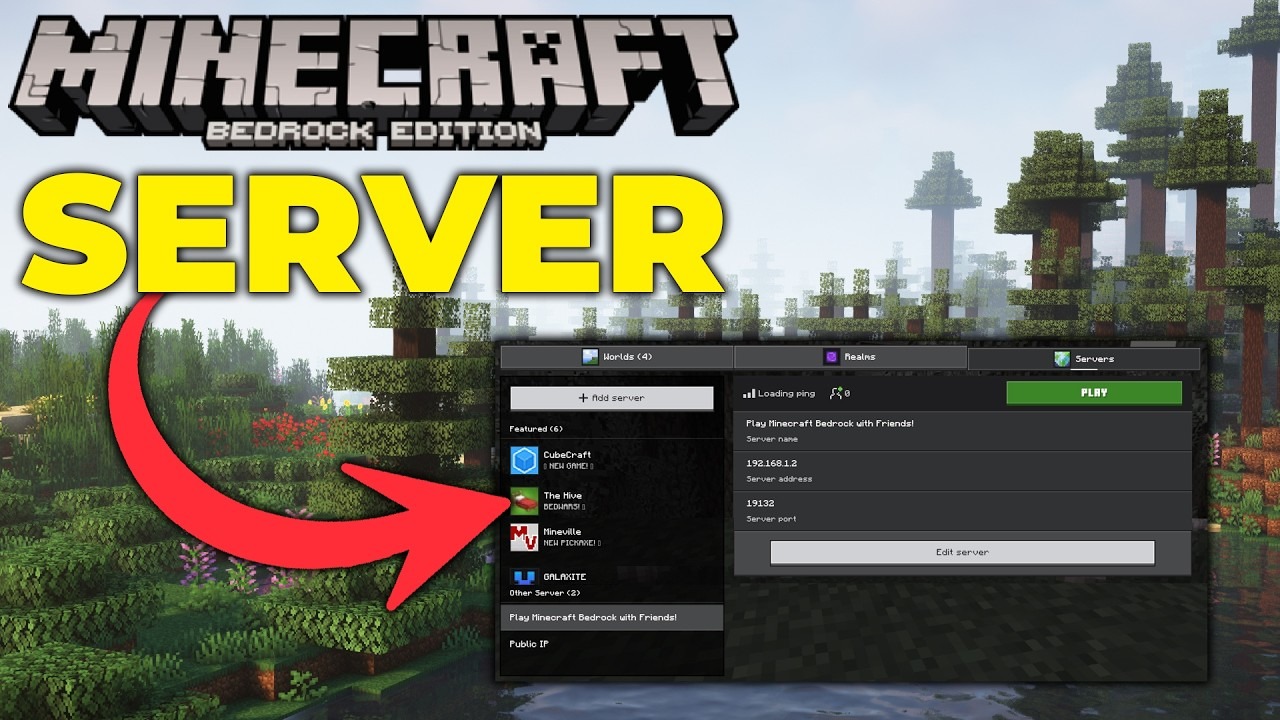
The console shows “Server started”! Add server in Minecraft: IP: yourpublicIP:19132
Invite friends—play! If there is lag, add more RAM in the launch script.
5. Managing Your Bedrock Dedicated Server with Add-ons
Keep your Bedrock dedicated server running smooth like a pro.
Updating: Download the new BDS ZIP, and replace the files (backup first!). Update add-ons from sites—re-edit JSONs.
Backups: Copy the world’s folder daily. Use the script: on Windows, a batch file to zip it. Store on Google Drive. Auto-backup prevents lost builds!
Security: Use whitelist.json for friends only. Online mode=true stops hackers. Change ports if needed. A firewall blocks bad guys. For add-ons, check trusted sources to avoid viruses.
Run 24/7 with tools like Screen (Linux) or always-on PC. Monitor with the console—kick bad players with /kick username.
Pro tip: For big servers, use Bedrock Server Manager for easy updates.
Your Bedrock dedicated server with add-ons stays safe and fun!
6. Common Issues and Troubleshooting
Problems happen, but fixes are easy!
Server not starting: Check Java? No, BDS doesn’t need it. Wrong OS? Use Windows/Ubuntu. Error logs? Read console—missing LD_LIBRARY_PATH on Linux.
Add-ons not working: UUID wrong? Copy exactly from the manifest. Experimental features? Toggle in server. properties (show experimental rules = true, restart world).
Connectivity issues: “Can’t connect?” Port forward UDP 19132. Firewall? Allow in Windows Defender. Wrong IP? Use the public one. NAT? Try UPnP or the playit.gg tunnel.
Other: Version mismatch—all use the same MC version. Lag? Fewer players or more RAM. Crashes? Update BDS.
Quick fixes:
| Issue | Fix |
| No start | Check ZIP extract, run as admin |
| Add-ons fail | Verify JSON, no spaces in UUID |
| Can’t join | Port forward + restart router |
| Lag | Close apps, allocate RAM |
Search “BDS [error]” for help. Your Bedrock dedicated server will rock!
Conclusion
Wow! You now know how to make a Bedrock dedicated server with addons. It’s your always-on world, packed with custom fun from addons. Benefits: Play anytime, no lag, total control, and endless adventures with friends.
From download to troubleshooting, a Bedrock dedicated server is simple and powerful. Add-ons for dragons, furniture, or super tools—make it yours!
Try it today! Share with buddies and check [Best Addons for Bedrock Server] or [Minecraft Bedrock Tips] for more. Happy mining!
FAQ